sukhi’s chicken tikka masala cooking instructions

Sukhis Chicken Tikka Masala is a beloved Indian-inspired dish, offering a convenient and flavorful meal. Made with tender chicken, creamy tomato sauce, and aromatic spices, it combines tradition with modern ease, perfect for a quick yet satisfying dinner;

1.1 What is Chicken Tikka Masala?

Chicken Tikka Masala is a popular Indian-inspired dish that has become a global favorite. It consists of tender pieces of chicken marinated in a blend of spices and yogurt, then grilled or cooked until flavorful. These chicken pieces are simmered in a rich, creamy tomato-based sauce, often seasoned with spices like cumin, coriander, and turmeric. The dish is known for its velvety texture and a balance of tangy and slightly smoky flavors. While its origins are debated, it is widely regarded as a comfort food that blends Indian culinary traditions with international influences. Sukhis Chicken Tikka Masala offers a convenient, pre-prepared version of this beloved dish, making it easy to enjoy at home while maintaining its authentic taste.

1.2 Popularity of Sukhis Chicken Tikka Masala

Sukhis Chicken Tikka Masala has gained immense popularity as a convenient and flavorful meal solution. Its pre-prepared format allows home cooks to enjoy an authentic Indian-inspired dish without the hassle of from-scratch cooking. The dish is particularly beloved for its tender chicken, rich, creamy sauce, and balanced blend of spices. Many fans praise its ease of preparation, with options for stovetop or microwave heating, making it a go-to for busy individuals and families. Its availability in stores like Costco further boosts its accessibility. The combination of traditional flavors and modern convenience has made Sukhis Chicken Tikka Masala a staple in many households, satisfying cravings for Indian cuisine effortlessly.

Ingredients Required

  • Chicken pieces
  • Yogurt
  • Lemon juice
  • Ginger-garlic paste
  • Tikka masala spices
  • Onions
  • Tomatoes
  • Cream
  • Water
  • Oil

2;1 Ingredients for the Chicken Marinade

The marinade for Sukhis Chicken Tikka Masala typically includes yogurt, lemon juice, ginger-garlic paste, and a blend of spices like cumin, coriander, turmeric, and garam masala. These ingredients ensure the chicken absorbs rich, aromatic flavors. The yogurt acts as a tenderizer, while the lemon juice adds a tangy note. Ginger-garlic paste provides a pungent aroma and depth to the dish. The spice blend infuses warmth and complexity. For extra flavor, some recipes suggest adding a pinch of cayenne pepper or a drizzle of oil. Marinating the chicken for at least 30 minutes to an hour allows the flavors to meld perfectly, resulting in juicy, flavorful pieces when cooked.

2.2 Ingredients for the Tikka Masala Sauce

The Tikka Masala Sauce is crafted with a rich blend of ingredients, including diced tomatoes, onions, garlic, and fresh ginger. A mix of spices like cumin, coriander, turmeric, garam masala, and chili powder adds depth and warmth. Heavy cream or coconut milk is often incorporated to achieve the signature creamy texture. A touch of butter or oil enhances the sauce’s richness. Some recipes include a splash of water or broth to balance the consistency. Optional additions like fresh cilantro for garnish or a squeeze of lemon juice can elevate the flavor. The sauce is carefully simmered to meld the flavors, creating a vibrant and aromatic base for the dish. This blend ensures the Chicken Tikka Masala is both hearty and flavorful, offering a delightful culinary experience.

Cooking Instructions

Cooking Sukhis Chicken Tikka Masala involves marinating chicken, grilling or pan-frying it, and simmering in a rich, spiced tomato sauce until tender and flavorful. Serve hot with rice or naan.

3.1 Marinating the Chicken

To prepare the chicken for Sukhis Chicken Tikka Masala, start by marinating it in a mixture of yogurt, lemon juice, ginger-garlic paste, and tikka masala spices. This step is crucial as it enhances the flavor and tenderness of the chicken. Combine all the marinade ingredients in a bowl and mix well. Add the chicken pieces and ensure they are evenly coated. Cover the bowl with plastic wrap and refrigerate for at least 1 hour, or preferably overnight for the best results. The longer the marination, the more flavorful the chicken will be. Once marinated, the chicken is ready to be grilled or pan-fried before adding it to the sauce.

3.2 Cooking the Chicken

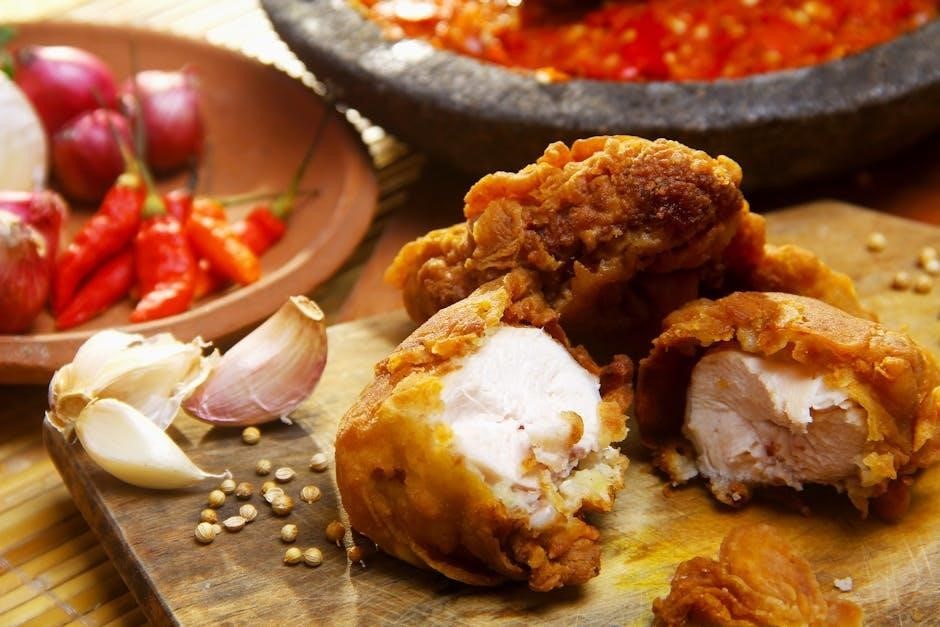
Cooking the chicken for Sukhis Chicken Tikka Masala involves grilling or pan-frying the marinated chicken. Preheat a grill or grill pan over medium heat. Remove the chicken from the marinade, letting any excess liquid drip off. Place the chicken pieces on the grill and cook for 5-7 minutes per side, or until they are nicely charred and cooked through. For pan-frying, heat a skillet with a small amount of oil over medium heat. Add the chicken in batches to avoid overcrowding, cooking until browned on all sides and fully cooked, about 6-8 minutes total. Ensure the chicken reaches an internal temperature of 165°F (74°C) for safety. Once cooked, the chicken is ready to be simmered in the Tikka Masala sauce.

3.3 Preparing the Tikka Masala Sauce

To prepare the Tikka Masala sauce, heat oil in a large saucepan over medium heat. Add chopped onions and sauté until golden brown, then stir in minced garlic and ginger. Next, add diced tomatoes, tikka masala spice blend, garam masala, turmeric, and red chili powder. Cook for 5-7 minutes, stirring occasionally, until the mixture thickens slightly. Pour in heavy cream or coconut cream and stir well. Bring the sauce to a gentle simmer and let it cook for 5-8 minutes, allowing the flavors to meld together. Season with salt to taste. Finally, add the cooked chicken to the sauce, tossing to coat evenly, and simmer for an additional 2-3 minutes to combine the flavors.

Heating and Serving

Heat Sukhis Chicken Tikka Masala on the stovetop or in the microwave until hot. Serve with basmati rice, naan, or lemon rice for a complete meal.

4.1 Stovetop Heating Instructions

For stovetop heating, remove the meal from its packaging and pour it into a medium-sized saucepan. Place the saucepan over medium heat and cover it with a lid. Allow the dish to heat for about 5-7 minutes, stirring occasionally, until the chicken and sauce reach your desired temperature. Be careful not to let it boil, as this could alter the texture of the sauce. Once heated through, remove from heat and serve hot. Ensure the meal is thoroughly cooked before consumption, and handle the saucepan with care to avoid burns.

4.2 Microwave Heating Instructions

To heat Sukhis Chicken Tikka Masala in the microwave, start by removing the meal from its packaging. Place the contents in a microwave-safe dish or tray. If your microwave has a turntable, ensure the dish is centered for even heating. Cover the dish with a microwave-safe lid or plastic wrap to prevent splattering. Heat on high for 2-3 minutes, depending on your microwave’s wattage. Carefully remove the dish, check the temperature, and stir gently. If not hot enough, heat in additional 30-second increments until warmed through. Let it stand for 1 minute before serving to ensure even heating. Always handle the dish with care, as it may be hot. Adjust cooking time based on your microwave’s power level to avoid overheating.

4.3 Serving Suggestions

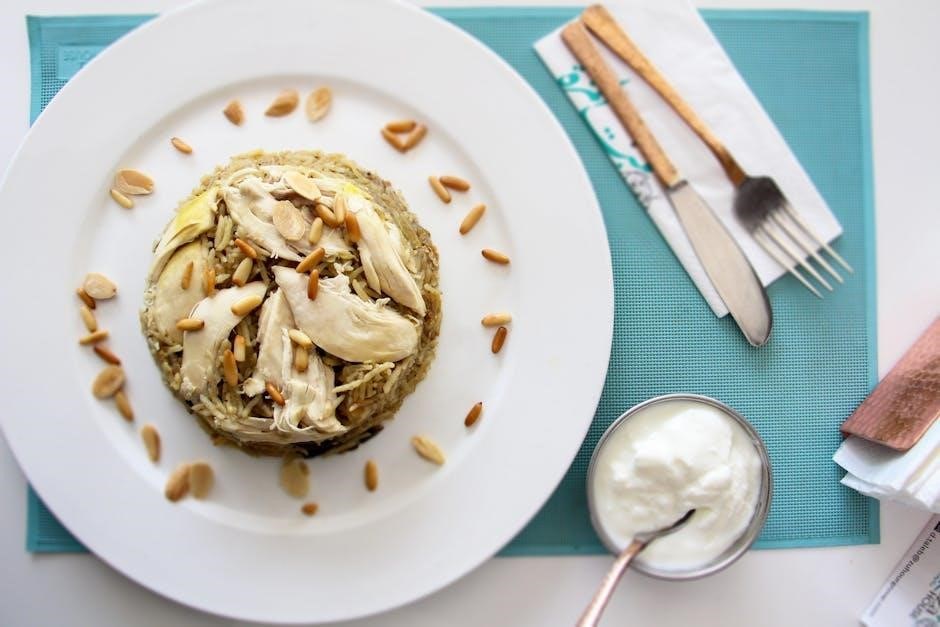
Sukhis Chicken Tikka Masala is best served hot, accompanied by fluffy basmati rice or warm naan for a traditional experience. For added flavor, pair it with a side of sautéed spinach or roasted vegetables. A fresh salad with cucumber raita (yogurt and cucumber sauce) complements the dish nicely. To enhance the meal, serve with a dollop of raita or a sprinkle of cilantro. For a low-carb option, try it with cauliflower rice or gluten-free naan. This versatile dish can also be served with steamed vegetables like peas or carrots for a balanced meal. Experiment with sides like papadum or pickles for extra texture and flavor, making it a satisfying and customizable dining experience.

Tips for Customization

Enhance Sukhis Chicken Tikka Masala by adding fresh herbs like cilantro or mint. For extra spice, sprinkle red chili powder or add diced jalapeños. Pair with naan, basmati rice, or roasted vegetables for variety. Adjust creaminess by adding more heavy cream or Greek yogurt. Experiment with sides like sautéed spinach or raita for a balanced meal. Customize to suit your taste preferences and dietary needs, ensuring a unique dining experience every time.

5.1 Adding Extra Spices

Elevate the flavor of Sukhis Chicken Tikka Masala by incorporating additional spices to suit your taste. For a spicier version, add a pinch of red chili powder or diced jalapeños during the simmering process. To enhance depth, mix in garam masala or ground cumin. For a smokier profile, add a sprinkle of smoked paprika. Experiment with a touch of turmeric for a vibrant color or a cinnamon stick for warmth. If you prefer a tangier sauce, squeeze in fresh lime juice or add a splash of tomato paste. Adjust seasoning gradually, tasting as you go, to avoid overpowering the dish. Pair with fresh cilantro or mint for a bright, herby finish. These additions allow you to personalize the dish, making it uniquely yours.

5.2 Including Vegetables

Enhance Sukhis Chicken Tikka Masala by incorporating vegetables for added texture and nutrition. Bell peppers, spinach, and zucchini are excellent choices. Sauté sliced bell peppers or zucchini in a pan for 3-4 minutes until tender before adding the sauce. For spinach, simply stir it in during the last minute of heating, allowing it to wilt into the flavorful sauce. Broccoli florets can also be steamed separately and mixed in. Adjust cooking times based on vegetable crispiness preference. This customization transforms the dish into a hearty, balanced meal, maintaining its rich and aromatic profile while offering variety. Experiment with different combinations to find your perfect blend of flavors and textures.

Safety and Storage

Handle hot components with care to avoid burns. Store leftovers in an airtight container and refrigerate at 40°F or below to ensure freshness and food safety.

6.1 Heating Precautions

When heating Sukhis Chicken Tikka Masala, always handle hot components with care to avoid burns. For microwave heating, ensure the film is punctured 2-3 times to prevent steam buildup. Never leave cooking unattended, as overheating can cause the sauce to splatter. On the stovetop, use medium heat and stir occasionally to maintain even heating. Avoid using metal utensils, as they may scratch the tray. Always check the temperature before serving, especially to children. Keep the product refrigerated at 40°F or below when not in use. Never reuse the tray for oven heating, as it is not oven-safe. Follow these precautions to ensure a safe and enjoyable dining experience with Sukhis Chicken Tikka Masala.

6.2 Refrigeration and Shelf Life

Store Sukhis Chicken Tikka Masala in the refrigerator at a temperature of 40°F or below to maintain freshness. Ensure the product is kept in its original packaging or a sealed container to prevent contamination. Consume within 3 to 5 days of opening for optimal flavor and texture. Avoid freezing, as it may alter the consistency of the sauce. Always check for any visible signs of spoilage, such as an off smell or mold, before consumption. If properly stored, the dish retains its quality and safety for the recommended shelf life. For best results, refrigerate immediately after purchase and before and after heating if not consumed entirely; This ensures a fresh and enjoyable meal every time.

Sukhis Chicken Tikka Masala offers a convenient and delicious meal, combining tender chicken with rich, aromatic spices. Perfect for a quick and satisfying dinner, it’s a flavorful solution for any evening.

7.1 Final Thoughts on Sukhis Chicken Tikka Masala

Sukhis Chicken Tikka Masala is a delightful and convenient meal option that delivers rich, authentic Indian flavors with minimal effort. The dish offers tender chicken in a creamy, aromatic sauce, perfect for satisfying cravings. Its ease of preparation makes it ideal for busy days, while the quality of ingredients ensures a satisfying dining experience. Whether cooked on the stovetop or in the microwave, it consistently provides a flavorful and hearty meal. For those seeking a quick yet delicious Indian-inspired dish, Sukhis Chicken Tikka Masala is an excellent choice that balances taste and convenience seamlessly.

7.2 Variations for Future Meals

For future meals, consider experimenting with Sukhis Chicken Tikka Masala by adding your own twists. Try substituting chicken with shrimp or paneer for a seafood or vegetarian option. Stir in fresh spinach, bell peppers, or zucchini for added nutrients and texture. Adjust the spice level by adding more red pepper flakes or a drizzle of hot sauce for extra heat. For a milder version, reduce the amount of tikka masala sauce or add a splash of cream. Serve with naan, basmati rice, or even cauliflower rice for a low-carb option. Pairing it with a side of raita or cucumber salad can also balance the flavors. These variations keep the dish exciting and tailored to your preferences, ensuring it remains a staple in your meal rotation.

lux plus vape pen instructions

The Yocan Lux Plus Vape Pen features a 650mAh battery, adjustable voltage settings, and a preheat function, designed for both casual and frequent users, ensuring optimal performance and convenience.

1.1 Overview of the Lux Plus Vape Pen

The Lux Plus Vape Pen is a sleek, portable device designed for optimal vaping experiences. It features a 650mAh battery, adjustable voltage settings (1.8V, 3.0V, 4.2V), and a convenient preheat function. The pen supports 510-thread cartridges, making it versatile for various vaping needs. Its compact design and durable build ensure both portability and longevity, catering to casual and frequent users alike.

1.2 Importance of Proper Usage

Proper usage of the Lux Plus Vape Pen ensures optimal performance, safety, and longevity. Following guidelines helps prevent clogging, maintains smooth vapor production, and maximizes battery life. Keeping the device upright, avoiding excessive inhales, and using the preheat function correctly are key to a seamless vaping experience. Proper care also prevents damage and ensures consistent functionality over time.

Key Features and Specifications

The Lux Plus Vape Pen features a 650mAh battery, adjustable voltage settings (1.8V, 3.0V, 4.2V), a 15-second preheat function, and safety features like overcharge protection for reliable performance.

2.1 Battery Capacity and Performance

The Lux Plus Vape Pen is equipped with a 650mAh battery, offering extended vaping sessions and consistent performance. Its high-capacity design ensures reliable power delivery, catering to both casual and frequent users with efficient energy management and seamless vapor production throughout the day.

2.2 Design and Build Quality

The Lux Plus Vape Pen boasts a sleek and compact design, measuring 16.5mm in diameter and 76.5mm in height. Crafted with durable materials, it ensures a premium feel while maintaining portability. The pen’s ergonomic build and polished finish enhance both style and functionality, making it a reliable choice for users seeking a balance between performance and aesthetics.

2.3 Voltage Adjustment Options

The Lux Plus Vape Pen features a unique silver dial at the top for easy voltage adjustment, offering three settings: 1.8V, 3.0V, and 4.2V. This allows users to customize their experience, from smooth vapor production to dense, full-bodied clouds. The intuitive dial ensures precise control, catering to both novice and experienced vapers seeking tailored performance.

2.4 Preheat Function

The Lux Plus Vape Pen includes a preheat function, activated by pressing the power button twice, with a 15-second cycle at 1.8V for optimal performance. This feature helps prevent clogging by ensuring even heating. To deactivate, press the button twice more. The preheat mode is designed to enhance vapor quality and maintain a consistent experience, making it ideal for users seeking efficient and smooth sessions.

Unboxing and Contents

The Lux Plus Vape Pen package includes the device, a USB charger, user manual, and a cartridge. Additional accessories may vary based on the retailer.

3.1 What’s Included in the Package

The Lux Plus Vape Pen package includes the device, a USB charger, a user manual, and a cartridge. Additional accessories like extra mouthpieces or a dab tool may be included, depending on the retailer. Ensure all items are accounted for before first use to guarantee a smooth setup experience.

3.2 Initial Inspection and Preparation

Inspect the Lux Plus Vape Pen for any damage or defects. Ensure the battery is turned off and the cartridge is securely attached. Charge the device if necessary using the provided USB charger. Before first use, read the user manual to understand the device’s features, such as the preheat function and voltage dial. Familiarize yourself with the power button and safety features like overcharge protection.

Setting Up the Lux Plus Vape Pen

Attach the cartridge by screwing it gently into the battery. Ensure the device is turned off for safety. Familiarize yourself with the power button and voltage dial for seamless operation.

4.1 Attaching the Cartridge

Turn off the device for safety. Locate the 510 thread on the battery. Screw the cartridge onto the thread clockwise until secure. Ensure the cartridge is properly seated and avoid overtightening to prevent damage. Once attached, the device is ready for use.

4.2 Preparing the Device for Use

Ensure the cartridge is securely attached. Turn the device on by pressing the power button five times. Allow it to heat up briefly. Set your desired voltage using the top dial, choosing from 1.8V, 3.0V, or 4.2V. Use the preheat function if needed by pressing the button twice. Take small, gentle puffs to avoid clogging and ensure smooth operation.

Charging the Battery

Charge the 650mAh battery using a USB charger. Plug in the device and wait for the indicator to signal full charge. Avoid overcharging to prevent damage.

5.1 Charging Methods and Safety Tips

The Lux Plus Vape Pen is equipped with a 650mAh battery. Use a USB charger to charge the device, ensuring the battery is fully charged for optimal performance. Avoid overcharging to prevent damage. For safety, keep the device upright while charging and avoid exposing it to water or extreme temperatures. Always use the included USB cable for reliable charging.

5.2 Charging Time and Indicators

The Lux Plus Vape Pen’s 650mAh battery typically charges in 2-3 hours via USB. The LED light blinks during charging and turns solid when fully charged. Ensure the device is unplugged immediately after charging. Always monitor the device while charging to prevent overheating. The LED indicator will also display battery status during use, ensuring you stay informed about remaining power levels.

Loading the Cartridge

To load the cartridge on your Lux Plus Vape Pen, ensure the device is turned off. Gently remove the mouthpiece to access the tank. Screw the 510-thread cartridge into place until secure. Fill the tank with your preferred material, taking care not to overfill. Replace the mouthpiece by twisting it back on. Ensure all connections are tight for proper function and safety. Always follow the manufacturer’s guidelines for optimal performance.

6.1 Removing the Mouthpiece

To remove the mouthpiece from your Lux Plus Vape Pen, start by ensuring the device is turned off for safety. Gently twist and pull the mouthpiece away from the device. Some models may require aligning notches or airflow holes before removal. Once removed, set the mouthpiece aside carefully to avoid misplacement. This step provides access to the tank or chamber for filling or cartridge installation. Always handle the mouthpiece with care to prevent damage or residue buildup.

6.2 Filling the Tank or Chamber

With the mouthpiece removed, carefully fill the tank or chamber with your desired material. For e-liquids, use a dropper to avoid overfilling. For wax or concentrates, place a small amount directly into the chamber. Ensure the device is turned off during this process to prevent accidental heating. Once filled, reattach the mouthpiece securely. Allow a few moments for the material to settle before use. Proper filling ensures smooth vapor production and prevents clogging. Always handle the materials with care to maintain device performance and safety.

Turning On the Device

Press the power button five times to activate the Lux Plus Vape Pen. The device is ready when the light blinks or stays on.

7.1 Power Button Activation

To activate the Lux Plus Vape Pen, press the power button five times rapidly. The device will turn on, indicated by the light blinking or staying on. Once activated, you can press and hold the button to vape. This feature ensures safe and controlled operation, preventing accidental firing. The 650mAh battery provides long-lasting performance for extended use.

7.2 Understanding Battery Indicators

The Lux Plus Vape Pen’s battery indicators provide clear feedback. When turned on, the power button light blinks, confirming activation. A blinking light also signals low battery. While charging, the light stays on, turning off once fully charged. These indicators ensure users are informed about the device’s status, promoting safe and efficient use without unnecessary guesswork or inconvenience.

Basic Usage Instructions

Turn on the device with five clicks. Inhale gently for smooth vapor production. Use the preheat function for optimal performance by pressing the button twice before use.

8.1 Inhaling and Vapor Production

Inhale gently and steadily through the mouthpiece. Take short, controlled breaths to avoid clogging. The Lux Plus delivers smooth vapor production, with adjustable voltage settings (1.8V, 3.0V, 4.2V) tailoring the experience to your preference for density and flavor.

8.2 Adjusting Voltage Settings

Use the top voltage dial to select your preferred setting: 1.8V for smooth vapor, 3.0V for balanced performance, or 4.2V for dense, full-bodied vapor. Adjust the dial gently to avoid damage. Always turn off the device before changing settings for safety. Experiment with different voltages to find your ideal vaping experience based on your material and preference.

Using the Preheat Function

Activate preheat mode by pressing the power button twice for a 15-second cycle at 1.8V, ensuring optimal material heating. Deactivate by pressing twice more.

9.1 Activating the Preheat Mode

To activate the preheat mode on the Lux Plus Vape Pen, press the power button twice. This initiates a 15-second preheat cycle at a fixed voltage of 1.8V, ensuring optimal material heating for a smooth and consistent vaping experience. The preheat function helps prevent clogging and enhances vapor production by preparing the coil or chamber before use.

9.2 Deactivating the Preheat Mode

To deactivate the preheat mode on the Lux Plus Vape Pen, simply press the power button twice. This will turn off the preheat function, allowing you to return to normal vaping mode. Deactivating preheat mode helps conserve battery life and prevents overheating, ensuring a safer and more efficient vaping experience when not needed.

Maintenance and Care

Regularly clean the Lux Plus Vape Pen with a cotton swab and isopropyl alcohol to prevent residue buildup. Store it upright to avoid clogging and damage.

10.1 Cleaning the Device

Regular cleaning is essential for maintaining the Lux Plus Vape Pen. Use a cotton swab dipped in isopropyl alcohol to wipe down the battery, cartridge area, and mouthpiece. Avoid letting liquids enter the device. Focus on the connection points and any visible residue. This prevents clogging and ensures optimal performance. Clean after every use for longevity.

10.2 Preventing Clogging

To prevent clogging, keep the Lux Plus Vape Pen upright when not in use and avoid taking large, frequent inhales. Store the device in a cool, dry place and ensure the cartridge is tightly secured. Regularly inspect and clean the connection points with isopropyl alcohol to remove residue. This helps maintain smooth airflow and consistent vapor production.

Troubleshooting Common Issues

Troubleshooting the Lux Plus Vape Pen involves addressing common issues like clogging or battery malfunctions. Ensure the device is clean, and connections are secure. For clogs, press the power button twice to activate preheat mode or use a cotton swab to clear blockages. If the battery doesn’t respond, check for loose connections and charge properly before use.

11.1 Resolving Clogging Problems

Clogging can occur due to improper handling or excessive draws. To resolve this, activate the preheat mode by pressing the power button twice, allowing the device to heat up and clear blockages. Use a cotton swab to gently remove any residue. Ensure the device remains upright during use to prevent oil from leaking into the airflow paths. This maintains smooth functionality and prevents future clogs; Proper care ensures optimal performance and longevity of the Lux Plus Vape Pen.

11.2 Fixing Battery or Voltage Issues

If your Lux Plus Vape Pen experiences battery or voltage problems, start by ensuring it’s fully charged using the recommended charger. Check the voltage setting and adjust it to the recommended level for your cartridge. If issues persist, reset the device by pressing the power button five times. This often resolves connectivity or voltage imbalances. Proper maintenance ensures reliable performance and longevity.

Safety Tips and Precautions

Always keep the device upright when in use. Avoid laying it down to prevent clogging. Do not take excessive inhales in a short period to avoid overheating. Store the pen safely and follow charging guidelines to ensure longevity.

12.1 General Safety Guidelines

Always follow proper usage guidelines to ensure safe operation. Keep the device upright to prevent oil leakage. Avoid excessive inhales in short periods to prevent overheating. Use the preheat function correctly to avoid clogging. Store the pen in a cool, dry place, away from flammable materials. Never leave the device charging unattended or use damaged cables. Regularly inspect for wear and tear, and address any malfunctions promptly.

12.2 Storage and Travel Safety

Store the Lux Plus Vape Pen in a cool, dry place, away from direct sunlight. Keep the device upright to prevent oil leakage. Use a protective case for travel to avoid damage. Ensure the pen is turned off before storing or traveling. Avoid exposing it to extreme temperatures or moisture. Always store it out of reach of children and pets for safety.

Tips for Optimal Performance

For optimal performance, adjust voltage settings according to your preference and use the preheat function. Maintain proper care and use techniques to ensure smooth vapor production.

13.1 Choosing the Right Voltage Setting

Adjust the voltage dial to 1.8V for smooth vapor, 3.0V for balanced performance, or 4.2V for dense, full-bodied vapor. Start with lower settings and increase as needed for optimal flavor and cloud production, ensuring a personalized vaping experience tailored to your preferences.

13.2 Managing Inhale Duration

Keep inhales short, around 2-3 seconds, to avoid overheating. Allow the device to cool slightly between puffs for consistent vapor. Avoid aggressive inhales, as this can cause clogging. For best results, take small, controlled puffs and let the vapor dissipate before inhaling again. Adjust your technique to suit your comfort level and desired vapor production.

Storing and Traveling with the Lux Plus

Store the device in a cool, dry place upright to prevent oil leakage. Use a protective case for travel, ensuring safe and convenient transportation.

14.1 Proper Storage Techniques

Store the Lux Plus Vape Pen upright in a cool, dry place to prevent oil leakage and clogging. Keep it away from direct sunlight and extreme temperatures. Ensure the device is turned off and clean before storage. Use a protective case to safeguard the pen during travel or when not in use.

14.2 Travel-Friendly Tips

Keep the Lux Plus Vape Pen upright to avoid oil leakage during travel. Avoid laying it down or taking large inhales in quick succession. Use a protective case for safe transport and ensure the device is clean and turned off before packing; Store in a cool, dry place to maintain performance and prevent clogging.

Upgrading or Replacing Parts

The Lux Plus Vape Pen allows for easy upgrading or replacing of parts, such as cartridges and batteries. Designed with 510 thread compatibility, it ensures seamless integration with various accessories. Always use original Yocan parts for optimal performance and longevity.

15;1 Replacing the Cartridge

To replace the cartridge on your Lux Plus Vape Pen, first ensure the device is turned off. Remove the mouthpiece to access the tank or chamber. Gently unscrew the old cartridge and attach the new one by screwing it clockwise until secure. Reassemble the device and ensure proper alignment for optimal performance. Always use compatible 510-thread cartridges for best results.

15.2 Upgrading the Battery

For upgrading the Lux Plus Vape Pen’s battery, select a compatible 510-thread battery with suitable voltage and capacity. Choose from various sizes to match your needs, ensuring optimal performance. Always refer to the user manual for specific recommendations and compatibility guidelines to ensure safety and functionality during the upgrade process.

The Lux Plus Vape Pen offers a user-friendly design with a 650mAh battery, adjustable voltage settings, and a preheat function, ensuring a smooth and efficient vaping experience for all users.

16.1 Summary of Key Points

The Lux Plus Vape Pen is a versatile and efficient device, featuring a 650mAh battery, adjustable voltage settings (1.8V, 3.0V, 4.2V), and a 15-second preheat function. Its user-friendly design, safety features like overcharge protection, and 15-second cutoff ensure a smooth vaping experience. Proper maintenance, including regular cleaning and upright storage, is essential for longevity. This device is ideal for both newcomers and experienced users, offering optimal performance and convenience.

16.2 Encouragement for Safe and Enjoyable Use

Enjoy your Lux Plus Vape Pen responsibly by following safety guidelines and maintenance tips. Experiment with voltage settings to find your perfect vapor experience. Keep the device upright to prevent clogging and avoid excessive inhales. Regular cleaning and proper storage will extend its lifespan. Embrace the convenience and versatility of this device while prioritizing safety for an enjoyable vaping experience.

instructions for intex air mattress

Intex air mattresses offer exceptional comfort, support, and portability, making them ideal for indoor and outdoor use. They feature durable designs and built-in pumps for easy setup.

Overview of Intex Air Mattresses

Intex air mattresses are renowned for their durability, comfort, and versatility, catering to both indoor and outdoor needs. Available in various sizes, from twin to queen, they offer sturdy support with weight capacities ranging from 300 to 600 pounds. Designed for convenience, these mattresses often include built-in electric pumps, enabling quick and effortless inflation. Their portability makes them ideal for camping trips, guest accommodations, or temporary bedding solutions. Intex air mattresses are crafted with high-quality materials to ensure long-lasting performance and a restful sleeping experience, whether at home or in the great outdoors.

Why Choose Intex Air Mattresses?

Intex air mattresses are a top choice for their ease of use, durability, and versatility. They feature built-in electric pumps for quick inflation, making setup effortless. Designed for both indoor and outdoor use, these mattresses offer superior comfort and support. Their compact designs and lightweight construction make them ideal for camping, travel, or temporary bedding solutions. Intex air mattresses are also budget-friendly and come in various sizes to suit different needs. With their focus on quality and innovation, Intex ensures a restful and comfortable sleeping experience, making them a trusted option for home and adventure.

Unboxing and Initial Setup

Unboxing your Intex air mattress reveals a compact design with a built-in pump, carrying bag, and clear instructions for easy setup and storage, ensuring convenience and readiness for inflation.

What’s Included in the Package

The Intex air mattress package typically includes the inflatable mattress, a built-in electric pump for easy inflation, a USB cable for power, and a carrying bag for convenient storage. Additionally, the package contains a detailed user manual with setup instructions, safety guidelines, and maintenance tips. Some models may also include a repair kit for punctures, ensuring longevity. The mattress is designed for both indoor and outdoor use, offering versatility for various settings. The included accessories ensure a seamless setup process, making it ready to use right out of the box. Always refer to the manual for specific contents, as they may vary by model.

Preparing the Pump and Accessories

Before using your Intex air mattress, ensure the built-in electric pump is properly prepared. Check the pump for any visible damage or blockages and clean it if necessary. For models with a USB-powered pump, connect the provided USB cable to a compatible power source, such as a wall adapter or vehicle charger. Familiarize yourself with the control dial to adjust airflow settings. Inspect the O-ring on the pump to ensure it is aligned correctly and not damaged, as this is crucial for a leak-free seal. Store all accessories, including the pump and power cord, in the provided carrying bag to keep them organized and within reach. Always refer to the user manual for specific instructions tailored to your model.

Choosing the Right Location for Inflation

Selecting the ideal location for inflating your Intex air mattress is crucial for optimal performance. Ensure the surface is flat, dry, and free from sharp objects to prevent punctures. Avoid inflating near open flames or sparks, as this could pose a safety hazard. For indoor use, place the mattress on a soft, even floor, such as carpet or a mat, to enhance comfort. Outdoors, choose a level, grassy area away from direct sunlight to avoid overheating. Always keep the mattress away from water sources, as it is not designed for aquatic use. Proper positioning ensures even inflation and extends the mattress’s lifespan. Follow these guidelines for a safe and enjoyable setup.

Safety Precautions

Never place infants under 15 months on the mattress. Avoid flammable substances and keep away from water. Follow all instructions to ensure safe usage and durability.

Important Safety Guidelines

Always follow the manufacturer’s instructions to ensure safe usage. Never place infants under 15 months on the mattress, as it poses suffocation risks. Avoid exposing the mattress to flammable substances or open flames. Use the mattress only as intended—never near water or as a flotation device. Keep it away from sharp objects to prevent punctures. Regularly inspect for damage and ensure proper inflation. Never over-inflate, as this can lead to leaks or structural weakness. Follow deflation procedures carefully to maintain integrity. Adhere to weight limits and usage guidelines to prevent accidents. Proper storage and maintenance are crucial for longevity and safety. Ignoring these guidelines may void the warranty or pose serious risks.

Weight and Usage Limitations

Intex air mattresses have specific weight limits, typically ranging from 300 to 600 pounds, depending on the model. Exceeding these limits can compromise structural integrity and safety. Always adhere to the recommended weight capacity to avoid potential damage or collapse. The mattress is designed for sleeping or sitting purposes only; avoid using it for activities that may overload it. Never place infants under 15 months on the mattress, as it poses serious safety risks. Overloading can lead to leaks, punctures, or loss of firmness, reducing comfort and lifespan. Ensure all users are aware of and comply with these guidelines for optimal performance and safety.

Warnings for Infants and Children

Intex air mattresses pose serious safety risks for infants and young children. Never place an infant aged 15 months or younger on the mattress, as it can lead to suffocation or entrapment. The soft, inflatable surface does not provide the necessary support for an infant’s developing body. Always follow Intex’s safety guidelines to ensure safe usage. For older children, supervise them closely to prevent accidental deflation or misuse. Intex strongly advises against using the mattress as a substitute for a crib or toddler bed. Prioritize your child’s safety and adhere to these warnings to avoid potential hazards.

Inflation Instructions

Intex air mattresses feature built-in electric pumps for effortless inflation. Simply plug in the pump, turn it on, and let it automatically fill the mattress to the desired firmness.

Using the Built-in Electric Pump

Intex air mattresses with built-in electric pumps offer a convenient and quick inflation process. Simply plug in the pump, turn it on, and let it automatically fill the mattress to your desired firmness. The pump is designed to stop once the mattress is fully inflated, ensuring optimal comfort and support. For models with USB compatibility, you can even power the pump using a portable charger or vehicle adapter. Always ensure the mattress is on a flat, stable surface before inflating. Keep the pump away from water and flammable substances for safety. Follow the manual instructions for specific settings and operation guidelines to ensure proper function and longevity of the pump.

How to Inflate Manually

If you prefer manual inflation, locate the valve stem on the mattress and remove the cap. Attach a compatible manual pump, such as a bicycle pump or foot pump, to the valve. Inflate slowly, checking the firmness periodically by pressing on the mattress. Continue until the mattress reaches your desired firmness. Once fully inflated, replace the valve cap to prevent air from escaping. For optimal support, ensure the mattress is firm but not overly rigid. Always follow the manufacturer’s guidelines for manual inflation to avoid over-inflating, which could damage the mattress. Regular manual inflation is a reliable option when electricity is unavailable.

Tips for Achieving the Perfect Firmness

Achieving the perfect firmness for your Intex air mattress ensures maximum comfort and support. Start by inflating the mattress slowly, checking its firmness periodically. Use the built-in pressure gauge if available, or press firmly on the surface to assess. Stop when the mattress feels supportive but not overly rigid. Over-inflation can cause discomfort and potentially damage the material. For manual inflation, use short, steady pumps and pause frequently to test. If using an electric pump, monitor the pressure closely to avoid exceeding the recommended level. Adjusting firmness is key to optimizing sleep quality and ensuring the mattress lasts longer. Always refer to the manufacturer’s guidelines for specific pressure recommendations.

Deflation Instructions

Deflate your Intex air mattress by opening the valve, pressing to release air, and using the pump if needed for full deflation. Store clean and dry.

Step-by-Step Deflation Process

To deflate your Intex air mattress, start by locating the valve and opening it to release air. For faster deflation, press the valve firmly.

If using a built-in pump, set it to deflate mode and let it run until the mattress is flat. For manual deflation, squeeze the mattress gently.

Ensure the mattress is completely deflated before cleaning and drying it thoroughly. Store it in a cool, dry place, away from sharp objects.

Regular deflation helps maintain the mattress’s quality and prevents damage. Always refer to the user manual for specific deflation instructions.

Storing the Mattress After Deflation

After deflation, ensure the mattress is completely dry to prevent mold or mildew. Fold or roll it neatly, taking care to avoid creases that might damage the material.

Place the mattress in its original storage bag or a sturdy, protective cover to shield it from dust and punctures.

Store it in a cool, dry location, away from direct sunlight and sharp objects. Regularly inspect the mattress before storage to ensure there are no leaks or damage.

Proper storage helps maintain the mattress’s durability and ensures it remains ready for future use. Always follow the manufacturer’s guidelines for storage to maximize its lifespan.

Maintenance and Care

Regularly clean the mattress with mild soap and water, ensuring it’s fully dry before storage. Inspect for punctures and patch them promptly. Avoid sharp objects and direct sunlight to maintain durability. Always store the deflated mattress in a cool, dry place to prevent mold and extend its lifespan.

Cleaning the Air Mattress

Regular cleaning is essential to maintain the quality and longevity of your Intex air mattress. Start by deflating the mattress completely and laying it flat on a clean surface. Use a mild soap solution and a soft cloth to gently wipe down the entire surface, paying attention to any stained or soiled areas. Avoid using harsh chemicals, abrasive cleaners, or rough scrubbers, as they may damage the material. Rinse thoroughly with clean water and allow the mattress to air dry completely before storage. Never fold or store the mattress while it is damp, as this can lead to mold or mildew. For tougher stains, a soft-bristle brush can be used, but ensure no excessive force is applied. Always follow the manufacturer’s cleaning guidelines to preserve the warranty and performance of your Intex air mattress.

Preventing Leaks and Punctures

To ensure your Intex air mattress remains leak-free, inspect it regularly for any signs of damage or wear. Always inflate the mattress on a smooth, flat surface, away from sharp objects or rough edges. Avoid over-inflating, as this can strain the seams and increase the risk of punctures. Store the mattress in a cool, dry place when not in use, and never fold or crease it sharply. If a leak is detected, mark the area and patch it immediately using the repair kit provided. Regular maintenance and proper handling will extend the lifespan of your Intex air mattress and prevent unwanted leaks or punctures.

Regular Inspection of the Pump

Regular inspection of the pump is essential to ensure optimal performance and longevity. Check the pump for any blockages, such as dirt or debris, which can hinder airflow. Ensure all connections, including the hose and valve, are secure and free from damage. Clean the pump with a soft cloth and avoid exposing it to moisture. If the pump malfunctions, refer to the troubleshooting section or contact Intex customer support. Always store the pump in a dry place when not in use. Proper maintenance and inspection will help prevent issues and keep your Intex air mattress functioning smoothly for years to come.

Troubleshooting Common Issues

Troubleshooting Intex air mattresses involves identifying leaks, fixing pump malfunctions, and addressing noise issues. Regular inspection and proper maintenance can prevent most common problems and extend lifespan.

What to Do if the Mattress Leaks

If your Intex air mattress leaks, inspect the surface for punctures or damaged seams. Apply soapy water to identify the leak source. Turn off the pump, deflate the mattress, and thoroughly dry it. For small punctures, use a patch kit provided with the mattress or purchase one separately. Ensure the valve is tightly closed and the O-ring is undamaged. If the leak persists, contact Intex customer support for assistance. Regularly checking and maintaining the mattress can prevent future leaks. Always follow the manufacturer’s instructions for repairs to ensure safety and longevity of the product.

Fixing a Malfunctioning Pump

If the pump on your Intex air mattress isn’t working, start by checking the O-ring for damage or misalignment. Ensure all connections are secure and the pump is properly plugged in. If the issue persists, try resetting the pump or replacing the O-ring. For severe malfunctions, contact Intex customer support for assistance or replacement parts. Regular maintenance and proper storage can help prevent pump issues. Always refer to the user manual for specific troubleshooting steps tailored to your model.

Solving Noisy Pump Issues

A noisy pump on your Intex air mattress can often be resolved by checking the O-ring for proper alignment and ensuring it’s free of damage. If the O-ring is damaged, replace it with a new one. Additionally, make sure all connections between the pump and mattress are secure. If the pump is still loud, try using it on a flat, stable surface and avoid over-inflating the mattress. For persistent noise, consider consulting the user manual or contacting Intex customer support for assistance. Regular maintenance and proper storage can also help minimize pump noise over time.

Comfort and Support

Intex air mattresses provide excellent comfort and support with adjustable firmness options and ergonomic designs, ensuring a restful sleep whether used indoors or outdoors.

Adjusting Firmness for Maximum Comfort

Intex air mattresses allow for easy firmness adjustments to suit individual preferences. Using the built-in electric pump or manual methods, users can inflate or deflate the mattress to achieve their desired comfort level. Proper firmness ensures optimal support for the body, promoting a restful sleep. The adjustable feature is particularly beneficial for different sleepers, as it accommodates varying weights and sleeping styles. Whether for indoor or outdoor use, Intex mattresses provide the flexibility to customize firmness, ensuring a comfortable experience in any setting. Regular adjustments can also prevent sagging and extend the mattress’s lifespan. This versatility makes Intex air mattresses a practical choice for diverse needs.

Using the Mattress for Different Purposes

Intex air mattresses are versatile and can be used for various purposes, from camping trips to temporary guest bedding. Their portability and ease of setup make them ideal for indoor and outdoor events. The mattress can also serve as a comfortable seating option for lounging or movie nights. Additionally, its compact design allows for easy storage, making it a practical solution for small spaces. Whether for overnight guests, outdoor adventures, or everyday use, Intex air mattresses provide a convenient and comfortable option for any setting. Their durability ensures they can withstand different environments, offering reliable support and comfort wherever needed.

Weight Capacity and Support

Intex air mattresses are designed to provide reliable support and accommodate various weight capacities, typically ranging from 300 to 600 pounds depending on the model. This ensures the mattress can comfortably support individuals or couples without compromising on comfort or durability. The weight capacity is clearly stated in the product specifications, and adhering to these limits is crucial for safety and longevity. The mattress distributes weight evenly, offering consistent support and preventing sagging. Whether for indoor or outdoor use, Intex air mattresses are engineered to deliver optimal support while maintaining their structural integrity, making them a dependable choice for a wide range of users.

Additional Tips for Optimal Use

For the best experience, use your Intex air mattress on flat surfaces, ensure proper firmness, and clean it regularly. Ideal for camping, guest rooms, or travel.

Using the Mattress Indoors vs. Outdoors

Intex air mattresses are versatile for both indoor and outdoor use, offering comfort in various settings. Indoors, they serve as convenient guest beds or temporary sleeping solutions. Outdoors, they are ideal for camping trips, providing a comfortable nights sleep on uneven terrain. Always ensure the surface is flat and free from sharp objects to prevent punctures. For indoor use, a mattress protector is recommended to maintain hygiene. Outdoors, deflate slightly for better grip on uneven ground. Both settings benefit from proper firmness adjustment and adherence to weight limits; Follow these tips to enjoy optimal comfort and durability in any environment.

Enhancing Sleep Quality on an Air Mattress

To enhance sleep quality on an Intex air mattress, ensure proper firmness by using the built-in pump for precise inflation. A mattress protector can add comfort and protect against spills or punctures. For extra support, consider adding a topper made of memory foam or gel. Always maintain the recommended weight limit to prevent sagging. Keep the mattress clean and dry to promote a healthy sleeping environment. For outdoor use, deflate slightly to adapt to uneven surfaces. Regularly inspect the mattress for leaks and ensure it is fully inflated before use. These steps will help maximize comfort and ensure a restful nights sleep on your Intex air mattress.

Traveling with Your Intex Air Mattress

Traveling with an Intex air mattress is convenient and hassle-free. Always deflate the mattress fully before packing to save space and ensure easy transport. Store it in a sturdy, breathable carry bag to protect it from damage. For outdoor trips, consider using a battery-powered pump for inflation without electricity. Regularly inspect the mattress for leaks or punctures before trips to avoid issues. When traveling, ensure the mattress is fully inflated and placed on a flat, dry surface. For camping, deflate slightly to accommodate uneven terrain. Always follow weight and usage guidelines to maintain durability. This versatility makes Intex air mattresses a great choice for any adventure.

Intex air mattresses offer unparalleled convenience, comfort, and durability, making them ideal for various settings. Proper usage and maintenance ensure a restful experience and long-lasting performance.

Final Thoughts on Intex Air Mattresses

Intex air mattresses are a practical and versatile solution for comfortable sleeping arrangements, whether for indoor guests, outdoor adventures, or everyday use. Their durable construction, built-in pumps, and easy setup make them a top choice for many users. With proper care and adherence to safety guidelines, these mattresses provide long-lasting comfort and support. Always follow the manufacturer’s instructions to ensure optimal performance and safety. Intex air mattresses are an excellent investment for anyone seeking a convenient and restful sleeping experience, offering great value for their quality and functionality.

Encouraging Proper Usage and Maintenance

Proper usage and maintenance are essential to ensure the longevity and safety of your Intex air mattress. Always follow the manufacturer’s guidelines for inflation, deflation, and storage. Regularly inspect the mattress for leaks or damage and clean it as needed to prevent mold and mildew. Store the mattress in a dry, cool place when not in use, ensuring it is fully deflated. Avoid exceeding weight limits and keep flammable substances away. By adhering to these practices, you can extend the lifespan of your Intex air mattress and enjoy a comfortable, safe sleeping experience for years to come.

amylu chicken sausage cooking instructions

Amylu chicken sausages offer a convenient, flavorful, and healthy meal option, perfect for various cooking methods like grilling, baking, or sautéing. This guide provides step-by-step techniques to ensure perfectly cooked sausages every time, catering to different tastes and preferences while maintaining their nutritional benefits.

Overview of Amylu Chicken Sausages

Amylu chicken sausages are premium, fully cooked products made from antibiotic-free chicken, offering a healthier alternative to traditional sausages. They contain no added nitrites or nitrates, except those naturally occurring in sea salt, and are pork-free, making them a great option for diverse dietary preferences. Available in a variety of flavors, these sausages are versatile and can be easily incorporated into numerous recipes, from breakfast dishes to hearty dinners. Their pre-cooked nature ensures convenience, while their hand-blended spices and real ingredients provide exceptional taste. Whether you’re grilling, baking, or sautéing, Amylu chicken sausages deliver consistent quality and flavor, making them a favorite for home cooks seeking delicious, wholesome meals.

Importance of Proper Cooking Techniques

Proper cooking techniques are essential to ensure Amylu chicken sausages are cooked evenly and safely. Even cooking prevents burning and guarantees a consistent texture and flavor. By following recommended methods, such as grilling, baking, or sautéing, you can achieve a perfectly cooked sausage every time. Proper cooking also helps retain moisture, preventing the sausages from becoming dry. Additionally, it ensures food safety by reaching the required internal temperature of 165°F. Mastering these techniques enhances the overall dining experience, allowing the natural flavors and spices of Amylu sausages to shine. Whether you’re a novice or an experienced cook, adhering to proper cooking techniques will elevate your meals and make the most of this versatile ingredient.

Key Benefits of Amylu Chicken Sausages

Amylu chicken sausages offer numerous advantages, making them a superior choice for health-conscious consumers. They are low in fat and high in protein, providing a nutritious meal option. With no added nitrites or nitrates (except those naturally occurring in sea salt), these sausages cater to individuals seeking cleaner ingredients. Additionally, Amylu uses antibiotic-free chicken, ensuring a product aligned with natural and sustainable practices. Their fully cooked format saves time, while the variety of flavors enhances versatility in cooking. These sausages are perfect for quick meals, catering to busy lifestyles without compromising on taste or quality. Their convenience, nutritional profile, and commitment to wholesome ingredients make Amylu chicken sausages a standout option for any meal.

Cooking Methods for Amylu Chicken Sausages

Amylu chicken sausages can be cooked using various methods, including grilling, baking, sautéing, pan-frying, slow cooking, air frying, and microwaving, ensuring a delicious and flexible meal every time.

Grilling Amylu Chicken Sausages

Grilling Amylu chicken sausages is a fantastic way to achieve a smoky, charred flavor. Preheat your grill to medium heat and place the sausages on the grates. Cook for 12-15 minutes, turning occasionally to ensure even browning. Use a meat thermometer to confirm the internal temperature reaches 165°F for safety. Since Amylu sausages are fully cooked, the goal is to warm them through and add a grilled texture. Brush with olive oil or your favorite seasonings before grilling for extra flavor. Grill until lightly charred and serve hot alongside your favorite sides or in a bun. This method adds a delicious outdoor twist to your meal, perfect for any occasion.

Baking Amylu Chicken Sausages

Baking Amylu chicken sausages is a simple and mess-free method that ensures even cooking. Preheat your oven to 375°F (190°C). Place the sausages on a baking sheet lined with parchment paper, leaving space between them for air circulation. Bake for 18-25 minutes, or until lightly browned and heated through. For added moisture, place water in the bottom of the pan. Since Amylu sausages are pre-cooked, baking primarily warms and enhances their flavor. You can also slice the sausages before baking for a crisper texture. This method is ideal for a hands-off approach, allowing you to prepare sides or other dishes while the sausages cook. Baking is a versatile option that maintains the sausages’ natural flavors while adding a touch of oven-roasted charm.

Sautéing Amylu Chicken Sausages

Sautéing Amylu chicken sausages is a quick and flavorful method that enhances their natural taste. Heat a skillet over medium heat and add a small amount of oil or cooking spray. Place the sausages in the skillet, leaving space between them for even cooking. Cook for 8-10 minutes, turning occasionally, until lightly browned and heated through. Since Amylu sausages are pre-cooked, this step focuses on warming and adding texture. For extra flavor, add sliced onions, garlic, or peppers to the skillet before cooking the sausages. Sautéing is a versatile method that pairs well with various seasonings and sauces, allowing you to customize the dish to your taste. This approach ensures a crispy exterior while maintaining juicy, flavorful interiors, making it a great option for a quick and delicious meal.

Pan-Frying Amylu Chicken Sausages

Pan-frying Amylu chicken sausages is a straightforward method that delivers crispy, flavorful results. Start by heating a skillet over medium heat and adding a tablespoon of oil or cooking spray. Place the sausages in the skillet, ensuring they are not overcrowded for even cooking. Cook for 8-10 minutes, turning occasionally, until golden brown and heated through. Since Amylu sausages are pre-cooked, pan-frying focuses on enhancing texture and flavor. For extra crispiness, increase the heat slightly toward the end of cooking. This method allows you to achieve a caramelized exterior while maintaining juicy interiors. Pair with your favorite seasonings or sauces for a quick and satisfying meal. Pan-frying is an ideal choice for those seeking a classic, savory dish with minimal effort.

Slow Cooking Amylu Chicken Sausages

Slow cooking Amylu chicken sausages is a convenient and flavorful method that ensures tender results. Place the sausages in a slow cooker with your choice of vegetables, sauces, or seasonings. Cook on low for 4-6 hours or high for 2-3 hours. The low heat infuses rich flavors into the sausages while keeping them moist. This method is perfect for hearty stews, casseroles, or one-pot meals. Add aromatic spices, broth, or tomatoes for a savory dish. Since Amylu sausages are pre-cooked, slow cooking enhances their texture and melds flavors. This hands-off approach is ideal for busy days, offering a delicious, stress-free meal ready when you are. Pair with grains or crusty bread for a satisfying dinner. Slow cooking Amylu sausages is a versatile and mouthwatering way to enjoy a home-cooked meal with minimal effort.

Air Frying Amylu Chicken Sausages

Air frying Amylu chicken sausages is a quick and healthy method that delivers crispy results without excess oil. Preheat the air fryer to 385°F (195°C). Place the sausages in a single layer, ensuring even cooking. Cook for 8-10 minutes, turning halfway through, until lightly browned and heated through. For added flavor, brush the sausages with olive oil and season with spices before cooking. This method is ideal for achieving a caramelized exterior while retaining moisture. Pair with roasted vegetables or serve on a bun for a satisfying meal. Air frying is a convenient and time-saving way to enjoy Amylu sausages with minimal effort, offering a crispy texture and flavorful outcome every time.

Microwaving Amylu Chicken Sausages

Microwaving Amylu chicken sausages is a quick and convenient cooking method, perfect for busy days. Place one link in the microwave and heat on high for 30-45 seconds. For three links, heat for 30-35 seconds. Adjust cooking time based on microwave power, ensuring the internal temperature reaches 165°F for safety. Avoid overheating, as this can dry out the sausages. Let them stand for a moment before serving. This method is ideal for a fast, flavorful meal with minimal cleanup. It’s a great way to enjoy Amylu sausages without compromising on taste or quality, making it a practical choice for those seeking a hassle-free cooking experience.

Step-by-Step Cooking Guide

Gather materials like a skillet, oven, or microwave. Preheat tools as needed, then cook sausages using methods like grilling, baking, or pan-frying. Ensure internal temperature reaches 165°F for doneness.

Materials and Tools Needed

To cook Amylu chicken sausages effectively, you’ll need specific tools depending on your chosen method. For grilling, a grill or grill pan is essential, while baking requires an oven and a baking sheet lined with parchment paper. Sautéing or pan-frying calls for a skillet or sauté pan over medium heat. If using a slow cooker, ensure it’s preheated and large enough to accommodate the sausages. Air frying requires an air fryer basket, and microwaving needs a microwave-safe dish. Regardless of the method, tongs or a spatula are handy for turning the sausages. A cutting board and knife are useful for slicing before or after cooking. Oven mitts and a meat thermometer are also recommended to ensure safe handling and proper internal temperature of 165°F.

Preparation Steps for Cooking

Before cooking Amylu chicken sausages, start by removing them from their packaging. Pat the sausages dry with a paper towel to ensure even cooking. If using frozen sausages, thaw them first in the refrigerator or under cold running water. For added flavor, slice the sausages into rounds or leave them whole, depending on your preference. Lightly brush with olive oil and season with salt, pepper, or your favorite spices. Preheat your chosen cooking appliance, such as a grill, oven, or skillet, to the recommended temperature. Ensure all utensils and surfaces are clean to maintain food safety. Once preheated, place the sausages in the cooking vessel, leaving space for even heat distribution. Always cook until the internal temperature reaches 165°F for safe consumption.

Monitoring Cooking Temperature

Monitoring the cooking temperature is crucial to ensure Amylu chicken sausages are cooked safely and evenly. Use a meat thermometer to check the internal temperature, which should reach 165°F for food safety. When grilling or pan-frying, maintain medium heat (around 375°F) and avoid charring. In the oven, preheat to 375°F for even cooking. For air frying, set the temperature to 385°F for crispy results. If microwaving, ensure even heating to prevent undercooked areas. Always check the temperature in the thickest part of the sausage. Adjust cooking times based on the method and whether the sausages are frozen or thawed. Proper temperature control ensures a juicy, flavorful outcome without overcooking.

Ensuring Even Cooking

To ensure even cooking of Amylu chicken sausages, spread them in a single layer on a baking sheet or skillet. For baking, preheat the oven to 375°F and cook for 15-20 minutes, flipping halfway. When grilling, rotate sausages every 4-5 minutes to avoid hot spots. In a skillet, stir occasionally to distribute heat evenly. For air frying, shake the basket midway through cooking. Microwaving requires turning sausages every 15 seconds to ensure uniform heating. Even cooking prevents undercooked or charred areas, ensuring a consistent texture and flavor. Always check for an internal temperature of 165°F. By following these tips, you can achieve perfectly cooked sausages every time, whether using conventional or modern cooking methods.

Checking for Doneness

To ensure Amylu chicken sausages are fully cooked, check for an internal temperature of 165°F using a meat thermometer. For visual cues, cooked sausages will appear lightly browned and firm to the touch, with no pink color remaining. When slicing, the interior should be opaque and uniformly cooked. Avoid piercing the sausages excessively, as this can release juices and dry them out. If cooking in a pan, ensure sizzling sounds and even browning on all sides. For grilling, check for char marks and a cooked texture. Always verify doneness before serving to guarantee food safety and optimal flavor. Properly cooked sausages will be juicy, tender, and free of raw spots, ensuring a delicious and safe meal. Consistent checking ensures perfection every time.

Recipe Ideas and Serving Suggestions

Enjoy Amylu chicken sausages in hearty one-pot meals, breakfast skillets, or as a protein-packed addition to sandwiches and wraps. Pair with roasted vegetables or quinoa for a balanced dish.

One-Pot Meal Recipes

Amylu chicken sausages shine in one-pot meals, offering a flavorful and convenient cooking experience. Try the Andouille Chicken Sausage One-Pot Meal, a vibrant mix of tender sausage, crisp vegetables, and aromatic spices. Sauté onions, garlic, and bell peppers, then add diced tomatoes and chicken broth for a hearty base. Brown the sausages first to enhance their smoky flavor, then simmer everything together until the flavors meld. Season with paprika, cumin, and a pinch of salt for depth. Serve hot over rice or with crusty bread for a satisfying meal. This dish is quick to prepare, making it ideal for busy days while delivering a delicious, home-cooked experience.

Breakfast Recipes with Amylu Sausages

Amylu chicken sausages add a delicious and protein-packed twist to breakfast dishes. Try the Breakfast Time sausages, mildly spiced for a balanced morning meal. Pan-fry sliced sausages with scrambled eggs, spinach, and diced bell peppers for a vibrant omelet. Alternatively, layer sausage links, cheese, and eggs in a breakfast burrito for a quick, satisfying start. For a hearty breakfast skillet, cook sliced sausages with hash browns, onions, and tomatoes, then top with eggs. Amylu sausages, being fully cooked and free of nitrites, offer a healthy and convenient breakfast option. Their versatility ensures a flavorful and nutritious beginning to your day, whether you prefer classic or creative recipes.

Sandwich and Wrap Ideas

Amylu chicken sausages are a fantastic addition to sandwiches and wraps, offering a flavorful and protein-rich base. For a gourmet option, layer sliced Andouille chicken sausage with brie cheese and fresh arugula on a crusty baguette. Drizzle with balsamic glaze for a tangy finish. Alternatively, create a hearty wrap by filling a whole-grain tortilla with grilled sausage slices, roasted peppers, hummus, and mixed greens. For a classic comfort meal, serve the sausages on a bun with caramelized onions, mustard, and sauerkraut. These versatile sausages can also be paired with avocado, lettuce, and tomato for a fresh, lighter option. Whether you prefer bold flavors or simple combinations, Amylu sausages elevate any sandwich or wrap into a satisfying meal.

Pairing with Vegetables and Grains

Amylu chicken sausages pair perfectly with a variety of vegetables and grains, creating balanced and flavorful meals. Try roasting sliced sausages alongside zucchini, bell peppers, and onions, tossed in olive oil, garlic, and herbs like thyme and rosemary. For a hearty one-pot dish, combine the sausages with quinoa, cherry tomatoes, and spinach, cooking until the grains are tender and the flavors meld together. Alternatively, serve the sausages atop a bed of brown rice or couscous, accompanied by steamed broccoli and a drizzle of balsamic glaze. These versatile pairings not only enhance the meal’s nutritional profile but also offer a delicious way to enjoy Amylu sausages in a well-rounded dish.

Nutritional Benefits and Health Considerations

Amylu chicken sausages are low in fat, high in protein, and made without nitrites or nitrates, ensuring a healthier option. They also use antibiotic-free chicken for added safety.

Low-Fat and High-Protein Content

Amylu chicken sausages are crafted with lean, antibiotic-free chicken, offering a low-fat yet high-protein option. Each serving provides essential nutrients while keeping calorie intake in check, making them ideal for health-conscious individuals seeking flavorful, guilt-free meals. The balanced fat and protein content ensures satisfaction without compromising on taste or dietary goals. This makes Amylu sausages a great choice for those looking to maintain a healthy lifestyle without sacrificing culinary enjoyment.

No Nitrites or Nitrates Added

Amylu chicken sausages are made without added nitrites or nitrates, ensuring a cleaner and healthier option for consumers. This commitment to natural ingredients aligns with the growing demand for products free from artificial preservatives. The absence of these additives makes Amylu sausages a preferred choice for health-conscious individuals seeking flavorful yet wholesome meals. By using only naturally occurring preservatives found in sea salt, Amylu maintains the integrity of its products while delivering great taste. This dedication to transparency and quality reflects the brand’s mission to provide better-for-you food options without compromising on flavor or safety.

Antibiotic-Free Chicken

Amylu chicken sausages are crafted using antibiotic-free chicken, ensuring a product that aligns with ethical and health-conscious standards. This commitment to raising chickens without antibiotics promotes better animal welfare and reduces the risk of antibiotic resistance. The brand’s focus on sourcing high-quality, responsibly raised chicken ensures that every sausage is not only delicious but also supports sustainable farming practices. This dedication to transparency and quality makes Amylu sausages a trusted choice for those seeking wholesome, ethically produced foods. By choosing antibiotic-free chicken, Amylu provides consumers with a product that is both healthier and more environmentally friendly, reflecting their commitment to excellence and customer well-being.

Storage and Safety Instructions

Store Amylu chicken sausages in the refrigerator at 40°F or below. Use within 3 days of opening or by the “use by” date on the packaging. Freeze for longer storage, thawing safely in the fridge or cold water. Always handle with clean utensils and cook to an internal temperature of 165°F for food safety.

Refrigeration Guidelines

To maintain freshness and safety, store Amylu chicken sausages in the refrigerator at a temperature of 40°F (4°C) or below. Keep the sausages sealed in their original packaging or transfer them to an airtight container to prevent drying out. Use within 3 days of opening or by the “use by” date marked on the package. Avoid exposing the sausages to temperatures above 40°F for extended periods, as this can compromise food safety. Always check the packaging for any signs of damage or leakage before storing. For optimal quality, ensure your refrigerator is consistently at or below 40°F. Proper refrigeration prevents bacterial growth and ensures the sausages remain flavorful and safe to eat.

Freezing and Thawing Tips

Amylu chicken sausages can be frozen to extend their shelf life. Place them in a freezer-safe bag or container, ensuring no exposure to air or moisture. Store at 0°F (-18°C) or below. When thawing, refrigerate overnight or thaw in cold water, changing the water every 30 minutes. Avoid thawing at room temperature to prevent bacterial growth. For convenience, you can cook sausages directly from the freezer in dishes like casseroles or stir-fries. Cooking time may increase slightly when cooking from frozen. Always cook to an internal temperature of 165°F (74°C) for food safety. Proper freezing and thawing maintain the sausages’ quality and flavor, ensuring a delicious meal whenever you’re ready to cook.

Handling and Food Safety

Proper handling and food safety are crucial when preparing Amylu chicken sausages. Always store sausages in the refrigerator at 40°F (4°C) or below and use within 3 days of opening. When freezing, place sausages in an airtight container or freezer bag to prevent freezer burn. Thaw frozen sausages in the refrigerator or under cold running water. Wash hands thoroughly before and after handling sausages to avoid cross-contamination. Ensure all cooking surfaces and utensils are clean. Even though Amylu sausages are pre-cooked, reheating to an internal temperature of 165°F (74°C) is recommended for food safety. Never leave cooked sausages at room temperature for more than 2 hours. Discard sausages if they show signs of spoilage, such as an off smell or slimy texture. Follow these guidelines to enjoy safe and delicious meals with Amylu chicken sausages.

Amylu chicken sausages offer a versatile and delicious way to enhance your meals. With various cooking methods, they provide a convenient, healthy option for any dish. Enjoy experimenting and savoring the flavor!

Final Tips for Perfect Cooking

For perfect results, ensure consistent cooking by monitoring temperature and using a thermometer to confirm an internal temperature of 165°F. Avoid overcrowding pans to prevent steaming instead of browning. Experiment with seasonings and glazes for added flavor, and consider finishing with fresh herbs for a vibrant finish. Lightly oil pans or use non-stick cookware to prevent sticking. For grilling, preheat thoroughly and brush grates with oil. When air frying, pat sausages dry for crispiness. Let sausages rest briefly after cooking to retain juices. These tips ensure tender, flavorful Amylu chicken sausages every time, allowing you to enjoy a delicious, hassle-free meal.

Encouragement to Experiment with Recipes

Don’t be afraid to get creative with Amylu chicken sausages! Their versatility makes them a perfect canvas for experimenting with flavors and recipes. Try pairing them with roasted vegetables, adding them to one-pot meals, or incorporating them into breakfast dishes. For a quick and delicious snack, slice the sausages thinly and air-fry until crispy. You can also wrap them in dough for a tasty sausage roll or mix them into casseroles for added protein. The mild flavor of Amylu sausages pairs well with both spicy and savory seasonings, allowing you to tailor dishes to your taste. Whether you’re grilling, baking, or sautéing, the possibilities are endless, making Amylu chicken sausages a fun and versatile addition to your culinary repertoire.

magic bullet instruction manual

Welcome to the Magic Bullet instruction manual! This guide provides essential information to help you safely and effectively use your Magic Bullet blender.

Welcome to the Magic Bullet

Welcome to the Magic Bullet‚ your versatile and powerful kitchen companion! Designed for convenience and efficiency‚ this blender is perfect for preparing smoothies‚ sauces‚ and more. With its compact design and user-friendly interface‚ it’s ideal for home use. Inside this manual‚ you’ll find detailed guidance on safety‚ operation‚ and maintenance to ensure optimal performance. Explore the features‚ accessories‚ and recipes to unlock your Magic Bullet’s full potential. Let’s get started on this culinary journey together!

Purpose of the Manual

This manual is designed to provide comprehensive guidance for using your Magic Bullet safely and effectively. It covers essential safety precautions‚ operational steps‚ and maintenance tips to ensure longevity and optimal performance. By following the instructions outlined‚ you can maximize the functionality of your Magic Bullet while minimizing risks. This guide also includes troubleshooting solutions and warranty information to address any concerns you may have. Refer to this manual regularly to make the most of your Magic Bullet experience and enjoy seamless blending every time.

Important Safety Information

Always read and follow the safety guidelines in this manual to prevent accidents and ensure safe operation of your Magic Bullet. Avoid overfilling the cups‚ as this can lead to leakage or reduced performance. Never operate the device without food or liquid‚ as it may damage the blades or motor. Keep children away from the appliance‚ and handle hot cups with care. Regularly inspect the blades and cups for wear‚ and replace them if damaged. Proper usage and adherence to these precautions will help maintain the longevity and efficiency of your Magic Bullet.

Safety Precautions

Handle electrical components with care‚ avoid overloading the blender‚ and follow operational guidelines to ensure safe and efficient use of your Magic Bullet.

General Safety Warnings

Always read the manual carefully before use. Never operate the Magic Bullet without food or liquid in the cup. Avoid using it as an ice crusher. Keep the blender out of children’s reach. Ensure the base is on a stable‚ level surface. Never touch sharp blades or hot components. Avoid overheating by not running the motor continuously. Allow the motor to cool down if it stops working. Use heat-resistant pads when handling microwaved cups. Follow all safety guidelines to prevent accidents and ensure optimal performance;

Electrical Safety Tips

To ensure safe operation‚ always unplug the Magic Bullet when not in use. Avoid exposing electrical components to water or moisture. Use the blender on a dry‚ stable surface. Never tamper with the power cord or plug. If the unit overheats‚ unplug it and let it cool down for at least 15 minutes. Regularly inspect the cord and plug for damage. Do not overload the blender‚ as this can cause electrical issues. Follow these guidelines to maintain electrical safety and prevent potential hazards. Proper care extends the life of your Magic Bullet.

Operating Precautions

Always ensure the Magic Bullet is placed on a level‚ stable surface before use. Never operate the blender without food or liquid in the cup‚ as this can damage the blades. Avoid using the Magic Bullet as an ice crusher. Do not exceed the maximum fill line indicated on the cups to prevent leakage. Keep hands and utensils away from moving parts. Ensure the lid is securely locked before blending. If the unit overheats‚ stop use immediately and let it cool. Follow these precautions to ensure safe and effective operation. Proper usage extends the lifespan of your Magic Bullet.

Understanding Your Magic Bullet

The Magic Bullet is a versatile kitchen appliance designed to blend‚ mix‚ and chop ingredients efficiently. It features a compact power base‚ interchangeable cups‚ and durable blades.

Components of the Magic Bullet

The Magic Bullet includes a power base‚ tall cup‚ short cup‚ cross blade‚ and lip ring. These components work together for optimal blending performance. The power base houses the motor‚ while the cups and blades handle ingredients. The lip ring ensures a secure fit. Additional accessories like recipe guides enhance functionality. Each part is designed for safe‚ efficient use‚ making the Magic Bullet a versatile kitchen tool. Proper assembly and maintenance of these components ensure longevity and effective operation. Always refer to the manual for detailed instructions on handling and care.

Accessories Included

The Magic Bullet comes with several convenient accessories to enhance your experience. These include a recipe guide‚ user manual‚ and additional cups for versatile use. The recipe guide offers creative ideas‚ while the user manual provides detailed instructions. Extra cups allow for easy meal prep and storage. These accessories ensure you get the most out of your Magic Bullet‚ making it a practical addition to any kitchen. Proper use of these items‚ as outlined in the manual‚ ensures safety and optimal performance.

Operating Your Magic Bullet

Operating your Magic Bullet is simple and efficient‚ designed for quick blending and food prep. Follow the step-by-step guide for optimal results and safety.

Getting Started

To begin using your Magic Bullet‚ place the power base on a stable‚ flat surface. Align the cup or pitcher with the base and twist to secure. Add ingredients‚ ensuring not to exceed the MAX line. Pulse or blend as needed‚ using short bursts for optimal results. Always handle hot cups with care‚ using heat-resistant pads if necessary. Avoid overfilling to prevent leakage. Regularly clean and maintain the blades for consistent performance. Refer to the manual for specific guidelines on microwaving and dishwasher safety to ensure longevity and safe operation.

Using the Blades

The Magic Bullet comes with interchangeable blades designed for specific tasks. The cross blade is ideal for chopping‚ grinding‚ and blending ingredients‚ while the flat blade is perfect for pureeing and liquefying. Always ensure the blade is securely attached before use. Store unused blades in a protective case to maintain sharpness. Never touch the blades with bare hands‚ as they are extremely sharp. Regularly clean blades with mild soap and rinse thoroughly to prevent residue buildup. Replace dull blades to maintain optimal performance and safety during operation.

Step-by-Step Usage Guide

To use your Magic Bullet‚ start by preparing your ingredients and adding them to the cup. Ensure the cup is not overfilled‚ leaving space for proper blending. Twist the blade attachment securely onto the cup. Place the cup onto the power base‚ aligning the tabs. Pulse or blend until desired consistency is achieved. For tougher ingredients‚ use short pulses to avoid overheating. After blending‚ twist off the blade and rinse with warm water. Always operate on a stable surface and follow safety guidelines for optimal performance and longevity of your Magic Bullet.

Recipes and Usage Tips

Discover delicious and quick recipes‚ from smoothies to sauces‚ using your Magic Bullet. Explore tips to enhance your blending experience and unlock full potential effortlessly.

Popular Recipes

Explore a variety of quick and delicious recipes with your Magic Bullet‚ from nutrient-packed smoothies to creamy dips. Create frozen treats‚ blend hearty soups‚ or mix flavorful dressings effortlessly. Discover 10-second recipes perfect for busy lifestyles‚ ensuring healthy and tasty meals anytime. The Magic Bullet’s versatility makes it ideal for crafting everything from breakfast blends to post-workout shakes. Experiment with ingredients to invent your own signature recipes‚ unlocking endless culinary possibilities with ease and convenience.

Optimizing Your Blending Experience

For the best results‚ add liquid ingredients first‚ followed by solids for smooth blending. Use the pulse function for tough ingredients and ensure the cup is not overfilled. Experiment with layering ingredients to achieve desired textures. Regularly clean blades to maintain performance and prevent residue buildup. Store accessories neatly to keep your workspace organized. Try new recipes and techniques to maximize versatility; These tips ensure your Magic Bullet operates efficiently‚ delivering consistent and delicious outcomes every time. Happy blending!

Cleaning and Maintenance

Regular cleaning ensures optimal performance. Wash all parts with mild soap and warm water; some components are dishwasher-safe. Dry thoroughly to prevent water spots and maintain longevity.

Proper Cleaning Procedures

Regular cleaning is essential for maintaining your Magic Bullet’s performance. Rinse all components immediately after use to prevent residue buildup. The cups‚ blades‚ and lids are dishwasher-safe‚ but hand washing with mild soap and warm water is recommended for delicate parts. Avoid using abrasive cleaners or scrubbers‚ as they may damage the surfaces. Dry all parts thoroughly to prevent water spots and bacterial growth. For tough stains‚ soak components in warm soapy water for 10-15 minutes before cleaning. Always sanitize the motor base with a damp cloth and ensure all pieces are completely dry before storing.

Maintenance Tips

To ensure your Magic Bullet lasts‚ regular maintenance is key. After cleaning‚ dry all parts thoroughly to prevent rust or water spots. Lubricate the gear system periodically with food-safe oil to maintain smooth operation. Avoid exposing the motor base to direct water; instead‚ wipe it with a damp cloth. Replace blades when they show signs of wear to maintain cutting efficiency. Store components in a cool‚ dry place to preserve their condition. Regularly check for any blockages or food residue in the blades or cups to ensure optimal performance. Proper care will extend the life of your Magic Bullet.

Troubleshooting

If your Magic Bullet stops working‚ unplug it and let it cool for 15 minutes. Check for blockages or worn blades and replace them if necessary.

Common Issues

Common issues with the Magic Bullet include overheating‚ blade dulling‚ and leakage. Overheating occurs from prolonged use or lack of ventilation. Dull blades result from frequent use or improper cleaning. Leakage may happen if the lid is not sealed tightly or if the gasket is worn. Additionally‚ the motor may stop working if the unit is overloaded or operated without food or liquid. Regular maintenance‚ proper usage‚ and timely replacement of worn parts can prevent these issues and ensure optimal performance.

Solutions and Fixes

To address common issues‚ start by allowing the Magic Bullet to cool down if it overheats. For dull blades‚ clean them regularly or replace when necessary. Leakage can be resolved by ensuring the lid is tightly sealed and the gasket is in good condition. If the motor stops‚ check for overloading and reset by unplugging and letting it cool. Proper cleaning and storage can prevent many issues. Regular maintenance and following the manual’s guidelines will ensure your Magic Bullet operates smoothly and efficiently‚ extending its lifespan;

Warranty and Support

Your Magic Bullet is backed by a comprehensive warranty ensuring coverage for parts and labor. For support‚ access our online resources or contact customer service directly. Assistance is just a click away to address any inquiries or concerns you may have. Our dedicated team is here to help you maximize your Magic Bullet experience. Visit our official website for detailed warranty information and support options tailored to meet your needs. Your satisfaction is our priority!

Warranty Information

Your Magic Bullet is protected by a limited warranty that covers manufacturing defects in material and workmanship for a specified period. The warranty typically lasts for one year from the date of purchase and requires proof of purchase. During this period‚ defective parts will be repaired or replaced free of charge. This warranty excludes damage caused by misuse‚ neglect‚ or normal wear and tear. For full details‚ refer to the warranty section in your manual or visit the official Magic Bullet website. Register your product to ensure warranty coverage and enjoy peace of mind with your purchase.

Customer Support Resources

For any questions or concerns about your Magic Bullet‚ visit the official website for comprehensive support. You’ll find a downloadable PDF manual‚ troubleshooting guides‚ and FAQs. Contact customer support via email‚ phone‚ or live chat for personalized assistance. The support team is available to address warranty claims‚ repair inquiries‚ or general product questions. Additionally‚ online forums and community resources offer tips and solutions from experienced users. Reach out to ensure optimal performance and longevity of your Magic Bullet. Help is just a click or call away!

Thank you for choosing the Magic Bullet! By following this manual‚ you’ve mastered its features and capabilities. Enjoy exploring endless culinary possibilities with your versatile kitchen companion.

Final Tips for Maximizing Your Magic Bullet

To get the most out of your Magic Bullet‚ always clean it thoroughly after use and store it in a dry place; Regularly check and replace worn blades to ensure optimal performance. Experiment with new recipes and ingredients to explore its full potential. Avoid overfilling the cups to prevent leakage. For tough ingredients‚ pulse in short bursts to avoid overheating. Finally‚ refer to the manual for troubleshooting common issues. Happy blending‚ and enjoy the versatility of your Magic Bullet!

Thank You for Choosing Magic Bullet

Thank you for selecting the Magic Bullet! We hope this manual has equipped you with the knowledge to use your blender effectively. With its powerful design and versatility‚ the Magic Bullet is perfect for creating delicious meals and snacks. For any questions or support‚ visit our official website or contact our customer service team. We appreciate your trust in Magic Bullet and look forward to helping you achieve culinary excellence. Happy blending!

nexgrill lighting instructions

Understanding Nexgrill lighting instructions is crucial for safe and efficient grilling. This guide covers key safety tips, component overview, and step-by-step ignition processes for optimal performance.

Safety Precautions and Warnings

Ensure LP gas tank is sufficiently full and never smoke while lighting. Always supervise cooking to prevent accidents and follow all safety guidelines.

Essential Safety Tips

Always adhere to safety guidelines when lighting your Nexgrill. Ensure the LP gas tank is sufficiently full and never smoke while lighting the grill. Open the lid during ignition to prevent gas buildup. Keep children and pets away from the grill during operation; Never leave the grill unattended while cooking. Regularly inspect gas lines for leaks using soapy water, and ensure proper ventilation. Store propane tanks upright and in a well-ventilated area. Follow all manufacturer instructions to avoid accidents and ensure a safe grilling experience.

Understanding Safety Symbols and Labels

Familiarize yourself with safety symbols and labels on your Nexgrill to ensure safe operation. Warning labels indicate potential hazards, such as flammable gas or hot surfaces. Symbols may include a flame icon for ignition areas or a propane tank icon for gas-related warnings. These labels are designed to prevent accidents and must be followed strictly. Always read and understand the meaning of each symbol before proceeding with lighting or maintenance. Ignoring these warnings can lead to burns, explosions, or other serious incidents. By recognizing and respecting these symbols, you can operate your grill safely and effectively.

Understanding the Key Components of Nexgrill Lighting

The Nexgrill lighting system includes burners, igniters, gas valves, and control knobs. These components work together to ensure a safe and efficient ignition process for your grill.

Overview of the Ignition System

The Nexgrill ignition system is designed for safe and reliable lighting. It includes a burner, igniter, and control knob. To ignite, turn the knob to release gas, then press the igniter button to spark. Ensure the lid is open during lighting to prevent gas buildup. Once lit, adjust the burner for desired heat. Always follow safety guidelines to avoid accidents. This system ensures efficient and controlled flames for optimal grilling performance. Proper use enhances both safety and cooking results.

Key Parts Involved in the Lighting Process

The key parts involved in lighting your Nexgrill include the control knobs, igniter button, burner ports, and gas lines. The control knobs regulate gas flow, while the igniter creates sparks to light the burner. Burner ports distribute the flame evenly, ensuring consistent heat. The gas lines supply fuel to the burners. Proper functioning of these components ensures a safe and efficient lighting process. Always check these parts before use to prevent issues. Regular maintenance, like cleaning burner ports, helps maintain optimal performance and prevents ignition problems. Understanding these parts is essential for troubleshooting and safe operation.

Step-by-Step Lighting Instructions for Nexgrill

Open the lid, turn the burner knob to the “light” position, press the igniter, and adjust the flame as needed for a safe and efficient start.

Pre-Lighting Checks and Preparations

Before lighting your Nexgrill, ensure all components are in good condition. Check gas lines for leaks, verify the LP tank is full, and ensure the grill is on a stable, heat-resistant surface. Open the lid to prevent gas buildup and avoid smoking during the process. Familiarize yourself with the ignition controls and ensure all burners are off. Clear the cooking area of any flammable materials and keep a fire extinguisher nearby. Proper preparation ensures a safe and efficient grilling experience.

The Actual Ignition Process

To ignite your Nexgrill, start by ensuring the lid is open to allow proper airflow. Turn the knob to the ignite position and press the igniter button until a click is heard. If using a rotisserie burner, push and turn the knob to the IGNITE/ON position. Once lit, adjust the burners as needed to achieve the desired flame. For side burners, follow similar steps, ensuring they light smoothly. Always maintain a safe distance and monitor the flame during the ignition process to avoid any potential hazards.

Ensuring a Safe and Efficient Burn

For a safe and efficient burn, monitor the flame color and adjust burners as needed to avoid yellow or orange flames, which indicate improper combustion. Regularly clean burners and ports to prevent blockages and ensure even heating. Always keep the grill attended while in use and maintain proper ventilation. After lighting, allow the grill to preheat for 10-15 minutes before cooking to achieve optimal temperatures. For Nexgrill models with smart technology, use the app to monitor and control the burn for consistent results. Never leave the grill unattended, especially when children or pets are nearby, and ensure all connections are secure to prevent gas leaks.

Lighting the Rotisserie Burner

Open the lid, then push and turn the rotisserie knob to IGNITE/ON. Ensure the burner lights promptly and reaches cooking temperature within minutes; Always stay nearby while in use.

Specific Instructions for the Rotisserie Burner

To light the rotisserie burner, open the grill lid and locate the rotisserie knob. Push and turn the knob to the IGNITE/ON position until you hear the igniter click. Ensure the burner lights evenly and reaches the desired temperature within a few minutes. Keep the lid open during the lighting process to avoid gas buildup. Once lit, monitor the flame to ensure it burns steadily and adjust as needed. Always keep the grill attended while the rotisserie burner is in use. Refer to the manual for troubleshooting if the burner does not ignite properly.

Tips for Using the Rotisserie Feature Safely

Always open the grill lid when lighting the rotisserie burner to prevent gas accumulation. Keep children and flammable materials away. Ensure the rotisserie is securely attached to avoid accidents. Never leave the grill unattended while the rotisserie is in use. Regularly inspect the burner and ignition system for blockages or damage. Keep the cooking area well-ventilated to prevent carbon monoxide buildup. Follow the manufacturer’s guidelines for temperature control and food placement. After use, turn off the rotisserie and allow it to cool before cleaning. Proper maintenance ensures safe and efficient rotisserie operation.

Using the Side Burner

Ensure the LP gas tank is full before using the side burner. Light the burner by pushing and turning the knob to the ignite position safely.

How to Light and Use the Side Burner

To light the side burner, ensure the LP gas tank is sufficiently full and the lid is open. Push and turn the side burner knob to the IGNITE/ON position. Once lit, adjust the flame as needed. Always monitor the burner while in use and never leave it unattended. Keep the area clear of flammable materials. After use, turn the knob to the OFF position and allow the burner to cool before covering. Proper usage ensures safe and efficient cooking with your Nexgrill side burner.

Best Practices for Side Burner Operation

For optimal side burner performance, always follow safety guidelines. Ensure the grill is on a level surface and the area is clear of obstructions. Never smoke or have open flames nearby while lighting. Regularly inspect the burner and connections for leaks or damage. After each use, clean the burner to prevent residue buildup. Store the grill securely when not in use. By adhering to these best practices, you can enjoy safe and efficient cooking with your Nexgrill side burner, enhancing your outdoor grilling experience.

Caring for and Maintaining Your Nexgrill

Regular cleaning and inspections are essential for maintaining your Nexgrill. Always check burner ports and igniter for blockages. Store the grill securely and use a cover to protect it from weather.

Post-Use Cleaning and Maintenance

After each use, clean your Nexgrill thoroughly to ensure longevity and performance. Turn off all burners and let the grill cool completely before starting maintenance. Use a stiff brush to remove food residue from grates, then wipe them with a damp cloth. Clean drip trays and grease pans regularly to prevent buildup. Inspect burner ports for blockages and clean them with a small brush or skewer. Wipe down exterior surfaces with mild soap and water. Cover the grill when not in use to protect it from weather and debris. Proper care ensures your Nexgrill remains in optimal condition for years.

Regular Maintenance to Prevent Issues

Perform routine maintenance to keep your Nexgrill functioning smoothly and prevent potential issues. Check gas hoses for leaks by applying soapy water; bubbles indicate a leak. Inspect burner tubes for blockages and clean them with a small brush if necessary. Lubricate moving parts, such as igniter electrodes, to ensure proper ignition. Replace worn-out parts promptly, like grill grates or heat deflectors, to maintain even cooking. Schedule annual professional inspections for gas lines and connections. Regular maintenance not only enhances performance but also extends the lifespan of your Nexgrill, ensuring safe and enjoyable grilling experiences year-round.

Troubleshooting Common Lighting Issues

Identify and resolve ignition problems promptly for seamless grilling. Check gas flow, ensure knobs function correctly, and clean burner ports to maintain optimal performance and safety.

Identifying and Solving Ignition Problems

Ignition issues can hinder your grilling experience. Start by ensuring the gas tank is full and properly connected. Check for blockages in burner ports, as food debris or dirt can obstruct the flame. If the igniter isn’t clicking, inspect the battery or wiring. For a weak or no flame, verify that the knobs are fully turned and the lid is open. Always refer to the manual for specific troubleshooting steps, and ensure all safety precautions are followed to avoid hazards. Regular maintenance can prevent these issues from arising. Keep your Nexgrill functioning smoothly with these simple solutions.

Addressing Low Flame or No Flame Situations

Low flame or no flame issues can be resolved by checking gas flow and connections. Ensure the LP tank is full and the regulator is functioning properly. Inspect burner holes for blockages and clean them if necessary. Verify that the igniter is clicking and sparks are visible. If the issue persists, check for damaged or worn-out parts like the igniter electrode or burner caps. Always follow safety guidelines and consult the manual for specific troubleshooting steps. Regular maintenance helps prevent such problems, ensuring a reliable grilling experience with your Nexgrill.

Additional Features of Nexgrill Grills

Nexgrill grills offer advanced features like smart technology integration and air fryer capabilities. These innovations enhance grilling efficiency and expand culinary possibilities for home cooks and enthusiasts.

Exploring Advanced Features for Enhanced Grilling

Nexgrill grills now feature Neevo™ smart technology, enabling seamless app control for temperature, timers, and lighting. This innovation allows for precise cooking and real-time monitoring, ensuring perfect results. Additionally, the integration of an air fryer function expands cooking versatility, offering healthier frying options without compromising flavor. These advanced features are designed to elevate grilling experiences, making Nexgrill models stand out in the market. By combining smart technology with traditional grilling, Nexgrill provides a modern, efficient, and user-friendly cooking solution for both novice and experienced grillers. This blend of innovation and functionality sets a new standard in outdoor cooking.

How to Utilize Smart Technology in Nexgrill Models

Utilizing smart technology in Nexgrill models enhances your grilling experience through app connectivity. The NEX-fi enabled grills allow you to control temperature, monitor cooking progress, and receive notifications via your smartphone. This feature ensures precise cooking and reduces the need for constant supervision. Additionally, the smart system can guide you through lighting the grill remotely, making the process efficient and convenient. By integrating these advanced features, Nexgrill models offer a modern, user-friendly approach to grilling, perfect for achieving perfect results every time. This technology not only simplifies grilling but also adds a layer of safety and control.